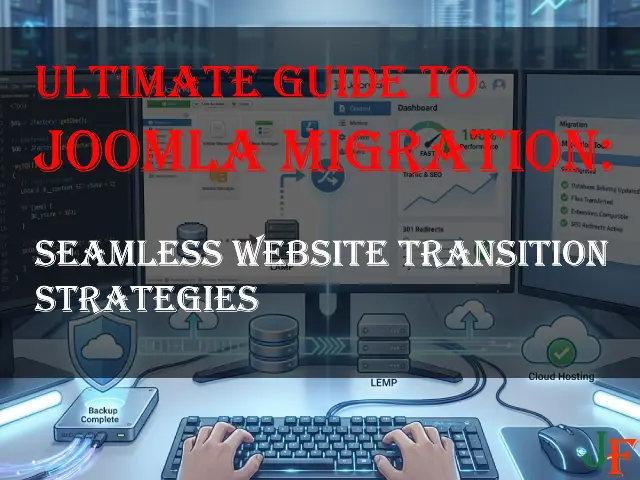
Upgrading from Joomla 3.10 to Joomla 4 is a worthwhile move for security, performance, and long-term support — but it can feel risky if your site uses third‑party extensions or a custom template. This guide gives a practical, beginner-friendly checklist you can follow to reduce risk: gather system info, create a staging copy, audit extensions, prepare backups and rollback steps, run a test upgrade, and execute the live upgrade with confidence.
Quick overview: What to expect when moving from Joomla 3.10 to Joomla 4
This section explains in plain language the main differences and the types of problems most likely to affect your site.
Joomla 3.10 vs Joomla 4 — key differences to be aware of
- Joomla 4 introduces updated administrator UI and usability improvements that change how some screens look and behave.
- Developer-facing changes include deprecated APIs and improvements that may require extension updates or template changes.
- Joomla 4 includes performance and SEO-focused improvements plus backend tooling that differ from 3.10.
Common reasons the upgrade can break a site (non-technical summary)
- Third‑party extensions (components, modules, plugins) that are incompatible or abandoned.
- Server PHP version and missing PHP extensions that differ between environments.
- Custom templates or overrides that rely on deprecated core behaviors.
A contact form extension that hasn’t been updated for Joomla 4 may stop sending messages after the core upgrade. Testing the entire form flow on a staging copy shows the issue before you touch production.
Do not assume an extension labeled “compatible” will work in every configuration — vendor compatibility notes can lag behind real-world results. Verify compatibility on staging first.
Pre-upgrade checklist (what to do before touching the live site)
Before you change anything on the live site, collect system facts, check server requirements, and make sure backups exist and are tested.
Gather essential site information
- Record current Joomla version (Administrator → System → System Information).
- Record current PHP version and enabled PHP modules (from hosting control panel or System Information).
- Create a list of installed extensions, template name/version, and a short list of critical site features (forms, login, ecommerce).
Server and PHP version checks (what to verify and where)
- Check PHP version from your host or Joomla system info and note it. Plan to test the target PHP version on staging first.
- Note required PHP modules (for example: mbstring, json). Confirm they are available for the PHP version you plan to use.
- Do not upgrade PHP on production before validating all extensions on staging.
How to list installed extensions in the admin and export the list
- Go to Extensions → Manage to view installed components, modules, plugins, languages, and templates.
- Take screenshots or copy the list into a CSV/text file: extension name, type, version, vendor, and whether it is a paid or free extension.
- Identify high‑priority items that affect checkout, login, or content submission.
- Site URL
- Joomla Core version: 3.10.x
- Current PHP version
- List of critical features (contact forms, ecommerce, login)
- Latest backup date and location
- Staging subdomain available
- Do not change PHP on production before successful staging tests — newer PHP can break older extensions.
- Avoid doing multiple major changes at once on live (for example, core upgrade plus many extension updates simultaneously).
How to audit your extensions and plugins for Joomla 4 compatibility
Most upgrade problems are caused by third‑party code. Auditing installed extensions helps you plan updates, replacements, or removals.
Classify your extensions
- Core/standard extensions (bundled with Joomla).
- Actively maintained third‑party extensions (regular updates, support).
- Commercial extensions (check vendor roadmap).
- Potentially abandoned extensions (no recent updates or support).
Using the Joomla Extensions Directory (JED) and vendor pages
- Search for each extension on JED and check compatibility notes for Joomla 4.
- For commercial extensions, review the vendor’s site, changelog, or support area for Joomla 4 support statements.
- Always verify vendor statements by testing on staging — JED entries may not be updated immediately.
How to identify abandoned extensions and what that means
- Signs of abandonment: no updates in several years, support requests unanswered, broken vendor website or payment flow.
- Abandoned extensions require a plan: replace, migrate data, or isolate functionality.
Export a list of installed extensions, pick three critical ones, and search each on JED and the vendor site. If one is abandoned, look for maintained alternatives and test data export/import paths.
- Do not delete an extension without testing — some extensions store important data that could be lost.
- Authentication and payment-related extensions are high-risk; prioritize their audit.
Set up a staging site and run a test upgrade
Always run the upgrade on a staging copy first. This is the safest way to discover issues without impacting visitors.
How to clone your site: options (Akeeba, hosting restore, manual copy)
- Akeeba Backup: create a full backup archive and restore it to a subdomain or separate folder using the provided installer.
- Hosting cloning tools: many hosts offer one-click site cloning or staging tools in the control panel.
- Manual copy: export the database and copy files, then edit configuration.php to point to the new database and domain.
Testing the upgrade on staging: specific steps and expectations
- Update staging PHP to the version you plan to use in production.
- Run extension updates on staging where available, then perform the Joomla core upgrade on staging.
- Enable error reporting temporarily and check server logs for errors or deprecation notices.
- Run a checklist of functional tests (login, key pages, forms, payments, admin tasks).
Clone to a protected staging subdomain using Akeeba; set robots.txt or basic HTTP auth to block search engines; change configuration.php to the staging DB; then run the upgrade. Document any errors and fixes.
- Keep staging and production separate. Do not point production DNS to staging or vice versa.
- Keep backups for both environments; do not rely on a single backup copy.
Backup and rollback plan — full file + database strategy
A tested backup and rollback strategy is the most important safety net during upgrades.
How to perform a full backup: files, database, and configuration
- Use a backup extension (for example, Akeeba) or your host’s backup tool to create a full site archive.
- For manual backups: compress all site files (public_html or equivalent) and export the database using phpMyAdmin or mysqldump.
- Always download a copy and store it off-site (cloud storage or a different server).
Rollback: restoring from backup and validating the restore
- Keep a clear naming convention (e.g., site_backup_YYYY-MM-DD_HHMM.zip and db_dump_YYYY-MM-DD.sql).
- Document restore steps for your environment and test the restore on a separate host or staging subdomain.
- After a restore, verify admin login, homepage, and critical functionality before declaring the site operational.
Keep 7 daily backups and a monthly backup for 6 months. Adjust retention based on storage, compliance, and site activity.
- A backup that has never been restored may fail when you need it. Test at least one restore periodically.
- Do not rely only on host backups unless you understand their retention and restore process.
Step-by-step upgrade process (safe execution on staging, then live)
This section lists the practical order of operations to perform the upgrade with minimal downtime.
Pre-upgrade on staging
- Update any extensions and the template on staging if official Joomla 4 compatible updates exist; test after each update.
- Run the Joomla core update on staging and follow any on-screen database migration prompts.
- Use Extensions → Manage → Database (or the equivalent admin tool) and run any 'Fix' or migration actions shown.
- Clear caches and test major site flows again.
Live upgrade checklist
- Take a final full backup (files + DB) and verify the backup integrity.
- Schedule a short maintenance window and put the live site into maintenance/offline mode.
- Update extensions (if required and tested on staging) and then run the core Joomla update.
- Run any required database fix/migration tools shown in admin.
- Clear caches, run smoke tests (admin login, homepage, forms), then disable maintenance mode when confident.
- Do not skip the database 'Fix' step after upgrading the core — it applies required database migrations.
- Keep logs and timestamps of actions taken so you can trace and roll back if needed.
Dealing with incompatible or abandoned extensions
When an extension lacks Joomla 4 support, you have several options. Choose based on the extension's role and the data it holds.
Options for incompatible extensions: update, replace, remove, isolate
- Update: if the vendor provides a Joomla 4 version, update on staging and retest.
- Replace: find a maintained alternative and plan data migration.
- Remove or disable: if non-essential, disable temporarily to permit the core upgrade.
- Isolate: consider external services or iframe-based workarounds for non-updated functionality.
How to safely disable problematic extensions for the upgrade
- Disable plugins via Extensions → Plugins and unpublish modules via Extensions → Modules. Keep the extension installed if possible to preserve settings.
- Document each disabled item with reason and date so you can re-enable and test later.
- Re-enable one at a time after the upgrade and retest functionality.
If a custom form extension is abandoned, export submission data, install a modern form extension on staging, import or map the data where supported, and test before switching on production.
- Removing an extension can remove its data. Always export or back up extension-specific tables before deletion.
- Some extensions place important data in custom database tables — back up these tables separately if unsure.
Post-upgrade checks: frontend, backend, logs, search engines
After an upgrade, systematically verify functionality and monitor logs and search engine status to detect issues early.
Common errors after upgrade and how to troubleshoot (logs, error reporting)
- Enable Joomla error reporting temporarily to surface warnings; check PHP and webserver error logs for fatal errors.
- Use the browser console to find JavaScript errors that may impact the frontend.
- If a critical process (e.g., checkout) is broken, consider rolling back to the tested backup while the issue is resolved.
Verification checklist: what to test first
- Admin login and user management actions.
- Homepage and top landing pages load correctly.
- Forms submit correctly and notifications are sent.
- Payment gateways and external API integrations function as expected.
- Scheduled tasks or cron jobs run as intended.
- Do not leave verbose error reporting enabled in production; it can expose sensitive information.
- Document deprecation warnings and plan follow-up fixes with a developer if many appear.
When to call a developer — red flags and cost tradeoffs
Some upgrade issues are best handled by an experienced Joomla developer. Knowing when to seek help saves time and prevents mistakes.
Red flags that indicate you should hire professional help
- Custom core hacks or heavy template customizations.
- Complex e-commerce flows or payment integrations that cannot be interrupted.
- Persistent fatal errors after staged fixes or database migration problems.
What to prepare before contacting a developer
- Staging access and admin credentials (use temporary or limited accounts where possible).
- List of installed extensions, links to vendor pages, and any compatibility notes you found.
- Recent backups and error log excerpts, plus a description of steps already tried.
- Document the site state thoroughly to reduce developer triage time.
- Consider a short paid audit first to obtain an exact estimate before larger work begins.
- Do not provide full production credentials without an agreement; prefer staging access or time-limited credentials.
- Avoid contractors who demand immediate access and make irreversible changes without backups.
Resources and next steps
This section lists recommended next actions and resources to help you complete the upgrade safely.
Recommended tools and documentation
- Official Joomla upgrade and migration documentation — verify exact steps and version requirements against official sources before proceeding.
- Joomla Extensions Directory (JED) to check extension compatibility.
- Backup and cloning tools such as Akeeba Backup or your host’s cloning tools; always consult the tool’s documentation for current instructions.
Suggested next steps after reading this guide
- Create your staging copy and run the pre-upgrade checklist within seven days.
- Audit and classify extensions, prioritize fixes for critical features.
- Perform the test upgrade on staging, fix issues, then schedule the live upgrade during a maintenance window.
- Plan periodic extension audits every 6–12 months to avoid future surprises.
Always verify external tool instructions and best practices against official documentation to ensure compatibility with current versions.
FAQ
Will my site 'blow up' if I run the automatic Joomla core upgrade?
A core upgrade alone can break a site if third‑party extensions, templates, or server PHP versions are incompatible. Follow the checklist: audit extensions, clone to staging, run the upgrade on staging, fix issues, take a final backup, and then perform the live upgrade during a maintenance window. If you are unsure, get a developer to review the staging results.
How can I check which extensions are compatible with Joomla 4?
Export or record your installed extension list (Extensions → Manage), then check each extension on the Joomla Extensions Directory or the vendor’s website for Joomla 4 compatibility notes. Always test extensions on a staging site running Joomla 4 because compatibility labels are not a substitute for real-world tests.
What if an extension is abandoned and has no update?
You can look for a maintained replacement, export the extension’s data and migrate it, disable the extension before upgrading if it’s non‑essential, or hire a developer to adapt or replace it. Always back up extension data before removal and test replacements on staging first.
Which PHP version do I need before/during/after the upgrade?
PHP requirements differ between Joomla 3.10 and Joomla 4. Check the official Joomla documentation for the exact minimum and recommended PHP versions. Update PHP on staging first and verify extensions work before changing production. Verify exact version numbers against Joomla's published requirements before making changes.
Will the Joomla core update automatically upgrade my third-party extensions?
The core update typically updates only the Joomla core. Extension updates are handled through the Extension Manager if the extension vendor provides update packages. Test the extension update flow on staging to confirm behavior in your environment and verify UI labels in your Joomla admin.
How do I roll back if something goes wrong?
Restore the tested full backup (files + database). Documented, tested restore steps are essential. If a restore fails, contact your hosting provider or a Joomla developer and provide backup details and error logs to assist recovery.
Conclusion
Upgrading from Joomla 3.10 to Joomla 4 is entirely achievable with planning and patience. The most important precautions are to audit extensions, create and test a staging upgrade, maintain reliable backups, and have a rollback plan ready. If you encounter customizations, persistent errors, or complex ecommerce dependencies, involve a developer. Follow this checklist to reduce surprises and keep your site working through the transition.


Add comment